
Digital Forensics for Beginners: How to Image a Disk, Carve Deleted Files, and Document Everything Like a Pro
Last summer i had a course on digital forensics basics in university. I loved digging for clues and information, yet the documentation part of it all, somehow bringing in a legal context aswell, kind of bothered me and my colleagues. We decided to change that, to make documentation as seamless as possible for our purposes. forensic-log-tracker is the outcome of this.
You Found the File. Now Prove You Didn´t Touch It.
Picture this: a Linux machine gets flagged. Someone deleted something they shouldn't
have. You're handed the system, told to investigate, and, after twenty minutes with
the right tools, you recover the file.
Nice work. But then comes the question nobody prepares beginners for:
Can you prove the disk image wasn't modified after you received it? Can you prove your timestamps are clean? Can you show, step by step, exactly what you did, and in what order?
In a real DFIR engagement, that documentation is the investigation. In a CTF with
forensics scoring, it's what separates a flag submission from an actual write-up worth
reading. And if you ever want to work in incident response professionally, chain of
custody isn't optional but rather the actual job.
Most beginner forensics guides teach you the recovery part. Almost none of them teach
you the documentation part. This one does both.
By the end of this guide, you'll know how to:
- Create a forensic disk image without altering the original evidence
- Recover deleted files using two battle-tested carving tools
- Log every step of your investigation automatically, timestamped and signed
- Generate a clean, shareable investigation report when you're done
No prior forensics experience needed. A Linux terminal and 20 minutes is enough.
The Setup: What You Need and Why
The Lab Image
You don't need special hardware, a seized hard drive, or a professional forensics
workstation.
Everything in this guide runs on a standard Linux terminal: Kali, Ubuntu,
Debian, all work fine.
Instead of building a disk image from scratch, I've prepared one for you. It's a 20MB
ext4 image with several deleted files hidden inside, along with some stuff
that carving tools alone won't find. Your job is to recover them.
Download it and verify its integrity before touching anything:
wget https://github.com/mev0lent/forensic-log-tracker/releases/download/lab01-v1.0.2/lab01.img
wget https://github.com/mev0lent/forensic-log-tracker/releases/download/lab01-v1.0.2/lab01.img.sha256

# Verify the image hasn't been tampered with
sha256sum -c lab01.img.sha256
You should see lab01.img: OK. If you don't, re-download before continuing. A hash mismatch means the file is corrupted or modified.
This verification step is your first act of forensic discipline: you're establishing that the evidence you received is exactly what was published, unchanged. Write down that hash. You'll understand why that matters in a moment.
Install the Tools
You'll need two carving tools and forensic-log-tracker for the documentation layer.
# Carving tools
sudo apt install foremost scalpel

# forensic-log-tracker (I suggest you do this inside a python venv)
pip install forensic-log-tracker
Here's what each one does before we go deeper:
- dd: creates bit-for-bit copies of disks or images. Already installed on (most)
Linux systems, no action needed. - foremost: scans raw disk data and recovers files based on known file signatures.
Fast, straightforward, good default choice. - scalpel: similar to Foremost but config-driven. More work to set up,
significantly more control over what you're looking for. - forensic-log-tracker: our CLI tool that executes forensic commands, logs their
output, hashes everything with SHA256, and optionally signs the log with your GPG key. Built by me and my colleagues exactly because documentation kept getting in the way.
On first run, flt initializes most of your config automatically, yet you still have to do
flt setupJust go with the GPG setup, it is there to cryptographically testify that nothing was altered by you in your research :D
You actually don´t need to use your real name for this yet in an official matter it would be wise. I did it like this for now:
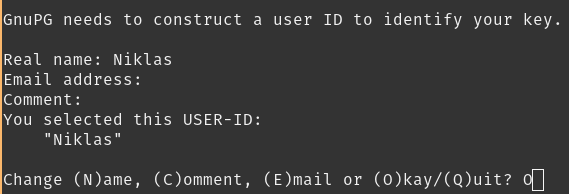
Setup a passwordfor your key and you're ready to go!
Now open ~/.config/forensic-log-tracker/config.yaml and set your analyst name before continuing; it gets embedded in every log entry.
The Golden Rule: Never Touch the Original
Before a single command runs against evidence, this principle needs to be locked in:
Never investigate the original. Always image first, work on the copy.
This is the difference between admissible evidence and compromised evidence.
The moment you mount a disk, your OS starts writing to it: access
timestamps update, journal entries get created, metadata shifts.
Even reading a file changes things.
lab01.img is your original. You'll make a working copy of it in the next step,
and that copy is what every subsequent command will touch. The original stays exactly
as it was when you verified that hash.
That mindset is what the rest of this guide is built on.
Let's create our project, our case, according to the README.
flt new-case practicing01 --description "Investigating a suspicious image most likely containing deleted evidence"
2026-04-05 15:46:49,864 [INFO] New case created: ...
[+] Logs for case 'practicing01' will be stored in: ...
Step 1 | Working With the Image (dd)
Before Foremost and Scalpel can do anything, you need a working copy of lab01.img
to investigate. This is where dd comes in.. and where most beginners skip a step
they'll later regret.
What dd Actually Is
dd stands for Disk Dump. It's a Unix tool that's been around since the 1970s and
does exactly one thing: copy data block by block, byte by byte, without caring about
filesystems, file names, or structure. It sees your disk the way a photocopier sees
a document; it doesn't read words, it copies pixels.
That property is what makes it forensically valuable. When you copy a file with cp,
the operating system interprets the filesystem and gives you the file's contents. When
you copy with dd, you get everything, including the empty space, the deleted sectors,
the fragments between files. That's exactly where your evidence hides.
Create Your Working Copy
Remember: Never run your investigation tools directly against lab01.img. That's your original. Treat it like a sealed evidence bag. Make a copy first:flt run "dd if=lab01.img of=working_copy.img bs=4M conv=noerror,sync status=progress" --case practicing01Every flag here has a reason:
| Flag | What it does |
|---|---|
if=lab01.img |
Input (the image you downloaded) |
of=working_copy.img |
Output (0your investigation copy) |
bs=4M |
Read and write in 4MB chunks, faster than the default 512 bytes |
conv=noerror |
Don't stop if there's a read error — keep going |
conv=sync |
If a block can't be read, pad it with zeros instead of skipping it |
status=progress |
Show live progress so you're not staring at a blank terminal |
conv=noerror,sync together is the forensic standard. A real damaged drive will have
bad sectors. Without these flags, dd would stop at the first read error and you'd
lose everything after it. With them, you get a complete image with problem areas
marked as zeros: recoverable, documented, intact.
Verify the Copy
Now hash both files and confirm they match:
flt run "sha256sum lab01.img" --case practicing01

# you can also use `-c` instead:
flt run "sha256sum working_copy.img" -c practicing01
Both hashes should be identical. If they are, you have a verified, pristine copy of
the original and you can prove it. If they differ, something went wrong during the
copy. Run it again before continuing.
This is the hash you'd record in a real chain of custody document. In a court
context, matching hashes are how you demonstrate that the evidence you analyzed
is identical to the evidence you received.
Each command gets logged with its output, a SHA256 hash of that output, a timestamp,
and a formal explanation of what the command does, automatically with forensic-log-tracker. Your investigation timeline has already started. Congratulations!
Take a Look Inside.. Without Mounting
Before running carving tools, it helps to understand what the filesystem looks like.
You can query the image directly without mounting it:
flt run "fdisk -l working_copy.img" -c practicing01
2026-04-05 16:17:41,881 [INFO] Executing command: fdisk -l working_copy.img
2026-04-05 16:17:41,918 [INFO] Log written to: .../logs/practicing01/2026-04-05T14-17-41-881642+00-00_command.log
2026-04-05 16:17:41,918 [INFO] Command executed, logged: fdisk -l working_copy.img
2026-04-05 16:17:42,508 [INFO] Signed logfile: 2026-04-05T14-17-41-881642+00-00_command.log.sig

[+] Command Output:
[STDOUT]
Disk working_copy.img: 20 MiB, 20971520 bytes, 40960 sectors
Units: sectors of 1 * 512 = 512 bytes
Sector size (logical/physical): 512 bytes / 512 bytes
I/O size (minimum/optimal): 512 bytes / 512 bytes

[STDERR]
This shows you the partition table, whether it's MBR or GPT, where partitions start,
what filesystem types are present. For lab01.img you'll see a single ext4 partition.
If you want to dig one level deeper and see what files the filesystem still knows
about (including entries for deleted files), use fls from the Sleuth Kit:
sudo apt install sleuthkit
flt run "fls -r working_copy.img" -c practicing01
\2026-04-05 17:36:24,805 [INFO] Executing command: fls -r working_copy.img
2026-04-05 17:36:24,856 [INFO] Log written to: .../logs/practicing01/2026-04-05T15-36-24-804919+00-00_command.log
2026-04-05 17:36:24,856 [INFO] Command executed, logged: fls -r working_copy.img
2026-04-05 17:36:36,784 [INFO] Signed logfile: 2026-04-05T15-36-24-804919+00-00_command.log.sig

[+] Command Output:
[STDOUT]
d/d 11:	lost+found
r/r 15:	readme.txt
V/V 5121:	$OrphanFiles
+ -/r * 12:	OrphanFile-12
+ -/r * 13:	OrphanFile-13
+ -/r * 14:	OrphanFile-14

[STDERR]
You'll notice something interesting: even though files were deleted, some of their
names still appear in the output, marked with an asterisk. The filesystem remembers
that something was there, even if it can't give you the contents back through normal
means. That's what the next two tools are for.
If terms like ext4, inodes, or partition tables are new and difficult to you, I covered all of
that in depth in my forensics challenge series, worth reading before continuing.
The second part there specifically is about sleuthkit if you want to read more on that toolsuite.
Checkpoint: dd
At this point you should have working_copy.img on disk, two
matching SHA256 hashes, an active flt case with three logged entries, and a rough
picture of what the filesystem contains. If anything is missing, go back before
continuing. Everything from here builds on this foundation.
Step 2 | Recovering Deleted Files with Foremost
You've got a verified working copy and a case log already running. The filesystem
told you something was deleted. Now we go get it back.
How File Carving Actually Works
Before running anything, it's worth understanding what's happening under the hood because it changes how you interpret the results.
When a file gets deleted on Linux, the OS doesn't wipe the actual bytes. It just
updates the directory entry to say "this space is available." The raw data sits
on disk, untouched, until something else gets written over it.
File carving exploits exactly that. Instead of asking the filesystem "what files
exist?", carving tools scan the raw disk byte by byte, looking for known file
signatures, specific byte sequences that mark the beginning and end of known
file types.
A JPEG, for example, always starts with these bytes:FF D8 FF
And ends with:FF D9
Foremost knows hundreds of these signatures. It scans your image from start to
finish, finds, e.g., a FF D8 FF, calls that the start of a JPEG, then keeps reading
until it hits FF D9, and extracts everything in between as a recovered file.
This is also why plain text files are harder to recover with carving tools. A.txt file has no magic bytes. There's no universal "text file starts here"
signature, it's just... characters. We'll come back to that limitation in a
moment.
Running Foremost
Point it at your working copy, never the original:
flt run "foremost -i working_copy.img -o foremost_output/ -v" -c practicing01
... # same as always, flt context, then:
[+] Command Output:
[STDOUT]
Foremost version 1.5.7 by Jesse Kornblum, Kris Kendall, and Nick Mikus
Audit File

Foremost started at Sun Apr  5 17:40:37 2026
Invocation: foremost -i working_copy.img -o foremost_output/ -v
Output directory: .../foremost_output
Configuration file: /etc/foremost.conf
------------------------------------------------------------------
File: working_copy.img
Start: Sun Apr  5 17:40:37 2026
Length: 20 MB (20971520 bytes)

Num	 Name (bs=512)	       Size	 File Offset	 Comment

0:	00010848.jpg 	      31 KB 	    5554176
1:	00010912.pdf 	       7 KB 	    5586944
Finish: Sun Apr  5 17:40:38 2026

2 FILES EXTRACTED

jpg:= 1
pdf:= 1
------------------------------------------------------------------

Foremost finished at Sun Apr  5 17:40:38 2026

[STDERR]
Processing: working_copy.img
|*|
Flag breakdown:
| Flag | What it does |
|---|---|
-i working_copy.img |
Input (the image to scan) |
-o foremost_output/ |
Output directory (Foremost creates this automatically) |
-v |
Verbose — shows progress as it scans |
Reading the Output
Foremost creates a structured directory for you:
ls foremost_output/
# audit.txt   jpg/   pdf/
audit.txt— the full log of everything Foremost found, including file offsets
and sizes. Always read this.jpg/— recovered JPEG filespdf/— recovered PDF files
Check what was recovered:
flt run "ls -lh foremost_output/jpg/ foremost_output/pdf/" -c practicing01
...
[+] Command Output:
[STDOUT]
foremost_output/jpg/:
total 32K
-rw-rw-r-- 1 user user 32K Apr  5 17:40 00010848.jpg

foremost_output/pdf/:
total 8.0K
-rw-rw-r-- 1 user user 7.7K Apr  5 17:40 00010912.pdf

[STDERR]
You should see at least one file in each directory. Open them.. if the JPEG renders and the PDF opens, the carve was successful.
The audit.txt File
This is the most important output Foremost produces, and most beginners ignore it.
Open it:
flt run "cat foremost_output/audit.txt" -c practicing01
It tells you exactly where on the disk each file was found, its byte offset.
In a real investigation, this offset is evidence: it tells you where on the
physical disk the file lived, which can help establish whether files were
planted, copied, or native to the system.
In a legal context, being able to say "this file was recovered from bytes 0–814 of the disk image, which corresponds to the first partition" is significantly more useful than just saying "we found a JPEG."
The Limitation Foremost Can't Get Around
Run this now:
flt run "strings working_copy.img | grep flag" -c practicing01You should see:
flag{forensics_is_not_just_carving}
Foremost didn't recover that. It never will, because plain text has no magic bytes for Foremost to find. This is one of the most important things to understand about file carving: it only finds what it has signatures for.
A skilled investigator doesn't stop at carving. They also run strings on the raw image, search for keywords, check filesystem metadata with fls, and use multiple tools in combination. The flag you just found with strings is your
reminder that no single tool tells the whole story.
Where Foremost Falls Short
Two honest limitations worth knowing before moving to Scalpel:
Fragmented files. Foremost assumes a file's bytes are contiguous on disk.
If a file was fragmented across non-adjacent blocks (common on heavily used drives), Foremost will either miss it or recover a corrupted version. Scalpel handles this better in some configurations.
Fixed signature list. Foremost ships with a default /etc/foremost.conf
that covers common file types. If you need to find something unusual, like a custom binary format, a proprietary database file, Foremost can't help without significant modification. Scalpel is built for exactly that use case, which is what the next section covers.
Checkpoint: Foremost
At this point Foremost should have recovered at least one JPEG
and one PDF from working_copy.img, both logged in your flt case. You've also found something Foremost couldn't, the text flag, using strings directly on the raw image.
That contrast is intentional. Keep both results in mind as you read the next section.
Step 3 | Going Deeper with Scalpel
Foremost got you started, yet Scalpel is where we get precise.
The core difference isn't really about power but rather philosophy kind of. Foremost ships ready-to-run with a built-in signature list and sensible defaults.
Scalpel ships with everything commented out, forcing you to explicitly define what you're looking for before itdoes anything.
That sounds like more work. It is. It's also exactly what you want in a real investigation.
How Scalpel Differs From Foremost
Both tools scan raw disk data for file signatures. But where Foremost makes
decisions for you, Scalpel puts you in control of three things:
What to look for. Every file type Scalpel searches for must be explicitly
enabled in its config file. Nothing runs by default.
How far to look. You define the maximum file size for each type. Scalpel
won't carve beyond that limit, which prevents it from extracting hundreds of
megabytes of garbage when it finds a header with no matching footer.
What the boundaries are. You define both the header and footer for each file
type. If a format has no footer, you define the maximum size and Scalpel carves
that many bytes from the header forward.
This config-driven approach makes Scalpel significantly more precise on known
targets and significantly more useful when you're hunting for something Foremost
doesn't know about.
Configure Scalpel Before Running It
Unlike Foremost, Scalpel does nothing until you tell it what to find. Open the
config file:
sudo nano /etc/scalpel/scalpel.conf
You'll see a long list of file types, all commented out with #. Find the JPEG
and PDF entries and uncomment them. They look like this:
# GIF and JPG files (very common)
        gif     y       5000000         \x47\x49\x46\x38\x37\x61        \x00\x3b
        gif     y       5000000         \x47\x49\x46\x38\x39\x61        \x00\x3b
        jpg     y       5242880         \xff\xd8\xff???Exif             \xff\xd9        REVERSE
        jpg     y       5242880         \xff\xd8\xff???JFIF             \xff\xd9        REVERSE

# ADOBE PDF
#---------------------------------------------------------------------
#
        pdf     y       5000000 %PDF  %EOF\x0d  REVERSE
        pdf     y       5000000 %PDF  %EOF\x0a  REVERSE
Remove the # from the lines you want active. The columns mean:
| Column | What it means |
|---|---|
jpg |
Output file extension |
y |
Case-sensitive header matching |
5242880 |
Maximum file size in bytes (5.2MB here) |
\xff\xd8\xff???Exif |
Header — magic bytes to search for |
\xff\xd9 |
Footer — where the file ends |
Save and close. Now Scalpel knows exactly what it's hunting.
Running Scalpel
flt run "scalpel working_copy.img -o scalpel_output/" -c practicing01
Scalpel will refuse to run if the output directory already exists, it won't
overwrite previous results, very important feature. If you need to rerun it:
rm -rf scalpel_output/
flt run "scalpel working_copy.img -o scalpel_output/" -c practicing01
Reading Scalpel's Output
ls scalpel_output/
# audit.txt   jpg-0-y-200000000/   pdf-0-y-5000000/
Scalpel names its subdirectories after the exact rule that matched — you can
see the file type, the case-sensitivity flag, and the size limit right in the
folder name. That's intentional: it makes your investigation log unambiguous.
Check what was recovered:
# folder names might be different for you, just adapt the command for yourself if necessary
flt run "ls -lh scalpel_output/jpg-3-0/ scalpel_output/pdf-5-0/" -c practicing01
Open the recovered files and verify they're intact. If both open correctly,
Scalpel confirmed what Foremost found — with a different engine and explicit
rules you can audit.
The Same Limitation Applies (Kind of)
Scalpel didn't find the txt either. And it never will, because the Foremost-limitation from earlier applies here too.
It's fundamental to file carving as a technique. No matter how precisely you configure your rules, no matter how many signatures you add
to scalpel.conf, carving tools only find what has structure. Plain text has none.
The full picture only appears when you combine all three approaches:
foremost: fast, broad, automatic signature carvingscalpel: precise, auditable, configurable signature carvingstrings+grep/awk: raw text extraction, no structure required
A real investigation uses all of them. The flag was your reminder.
I made a post last year where you can learn tools like awk, definitely recommend a readthrough on the basics!
Foremost vs Scalpel, Side by Side
At this point you've run both tools on the same image. Here's what that
comparison actually means:
| Foremost | Scalpel | |
|---|---|---|
| Configuration | Runs out of the box | Must configure before use |
| Signature control | Fixed built-in list | You define every rule |
| Output naming | By file type | By exact rule used |
| Best for | Quick triage, known file types | Targeted carving, custom formats |
| Audit trail | audit.txt | audit.txt with rule details |
Neither tool is better. They answer different questions. Foremost is your first
pass, fast, broad, automatic.
Scalpel is your second pass, deliberate, precise, auditable. In a real investigation you run both.
Why the Config File Matters Legally
This is worth pausing on. In a real forensic investigation, being able to show
exactly which signatures you searched for — and which you didn't — matters.
Scalpel's config file is a document. It records your investigative decisions:
what you looked for, what size limits you set, what you chose to exclude.
Combined with your flt case log, you can reconstruct every decision you made
during the investigation, in order, with timestamps and signatures.
That's chain of custody extending beyond just the evidence — it covers your
methodology too.
Log the config you used:
flt run "cat /etc/scalpel/scalpel.conf" -c practicing01
This embeds a snapshot of your exact Scalpel configuration into your case log
at the moment you ran the investigation. If the config ever changes on the
system later, your log still shows what rules were active when you ran it.
Checkpoint: Scalpel
You should now have recovered files in both foremost_output/
and scalpel_output/, with every command logged and signed in your flt case. Run flt report -c practicing01 and look at what you've built: a complete,
timestamped, GPG-signed record of an investigation.
That's the report you'd attach to a CTF write-up, a forensics challenge submission, or hand to a supervisor in a real engagement.
The Report | Your Investigation, Documented
You have recovered files, found a hidden flag, and logged every step. Now close
the case.
flt report -c practicing01
That's it. forensic-log-tracker reads every log entry in your case folder — every
command, every output hash, every GPG signature, every timestamp — and assembles
them into a single Markdown report at logs/practicing01/practicing01_report.md.
Open it. What you're looking at is a complete, chronological record of everything
you did — from the first sha256sum on the original image to the final Scalpel
run. Every command is there. Every output excerpt is there. Every hash is there.
Every entry is signed.
This is what you hand to a supervisor. This is what you attach to a CTF write-up.
This is what you put in front of a professor who asks you to prove you didn't
tamper with the evidence.
You didn't just recover the files. You recovered files and can prove how you did it.
What You Learned
You started this post with a downloaded disk image and no forensics experience.
You now know how to:
- Verify evidence integrity with SHA256 before touching anything
- Create a forensic working copy with
ddusing the correct flags - Recover deleted files by their magic bytes using Foremost
- Run targeted, auditable carving sessions with Scalpel
- Find evidence that carving tools miss entirely using
strings - Document an entire investigation automatically with forensic-log-tracker —
timestamped, hashed, and GPG-signed
That last point is the one most guides skip. The tools are learnable in an
afternoon. The discipline of documentation is what separates someone who
did forensics from someone who can prove what they found.
Where to Go From Here
This was one image with a few planted files. Real investigations are messier —
fragmented drives, encrypted volumes, wiped partitions, anti-forensic tools
designed to defeat exactly what you just learned.
A few directions worth exploring next:
- Memory forensics — disk images capture what was stored. RAM captures
what was running. Volatility is the tool. I'll cover it in a future post. - Sleuth Kit deeper dive — dive into
fls,icat,fsstatand the rest of the
TSK toolset in their own post. You got a taste withflstoday. - Real CTF forensics challenges — take what you learned here and apply
it. CyberDefenders and HackTheBox both have beginner-friendly forensics
challenges. My writeups are here. - forensic-log-tracker — it's open source, actively developed, and has
a growingexplanations.yamlthat needs contributions. If you used it today
and have a tool explanation to add, open a PR.
# Star the repo if this was useful
# github.com/mev0lent/forensic-log-tracker
forensic-log-tracker is a student project born out of frustration with
documentation. If you hit a bug, found a limitation, or have a feature idea,
open an issue. That's how it gets better.
No spam, no sharing to third party. Only you and me.


Member discussion