
[+] Final Part: Active Directory Journay Day Five: Building, Securing, and Managing a Domain
Table of Contents
Alright! We can now finally get into the Active Directory Lab at the end of the AD Intro course on HackTheBox Academy.
Let’s review what we have learned, fill some gaps and get better.
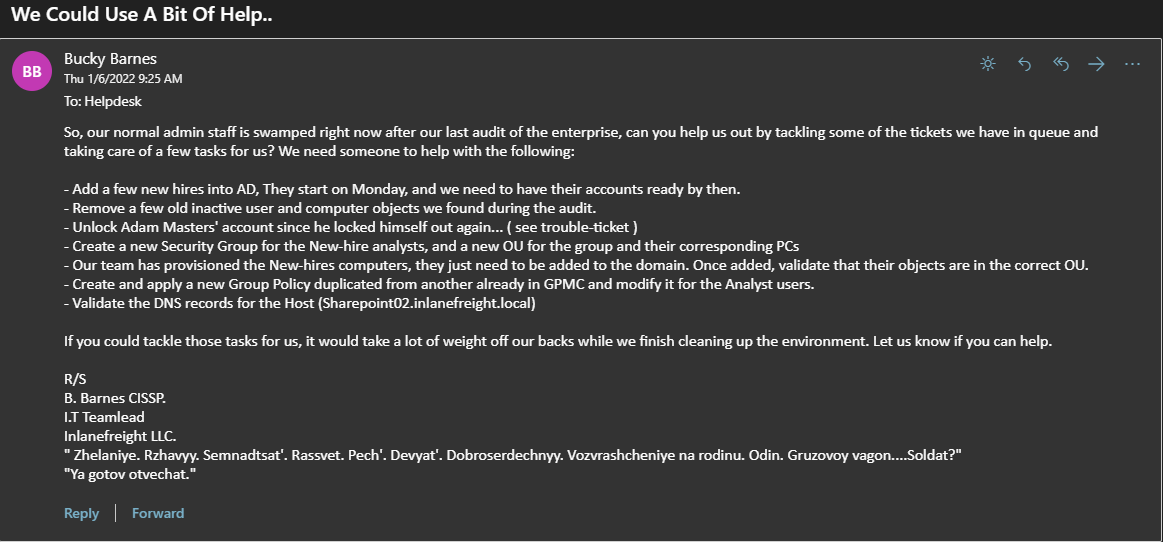
I frickin LOVE the Winter Soldier Easter Egg down at the bottom! Fine, i’ll watch Captain America 2 again.
Okay, seems we’re tasked with helping out the Inlanefreight it department today, closing some tickets - we could even get a promotion? nice hehe
Connecting to our Lab
Remember RDP? We talked about it in our series - we’ll use xfreerdp to connect to our Windows host.
This helpful doc site will help us with PowerShell commands regarding Active Directory.
xfreerdp /v:10.129.202.146 /u:htb-student_adm /p:Academy_student_DA!
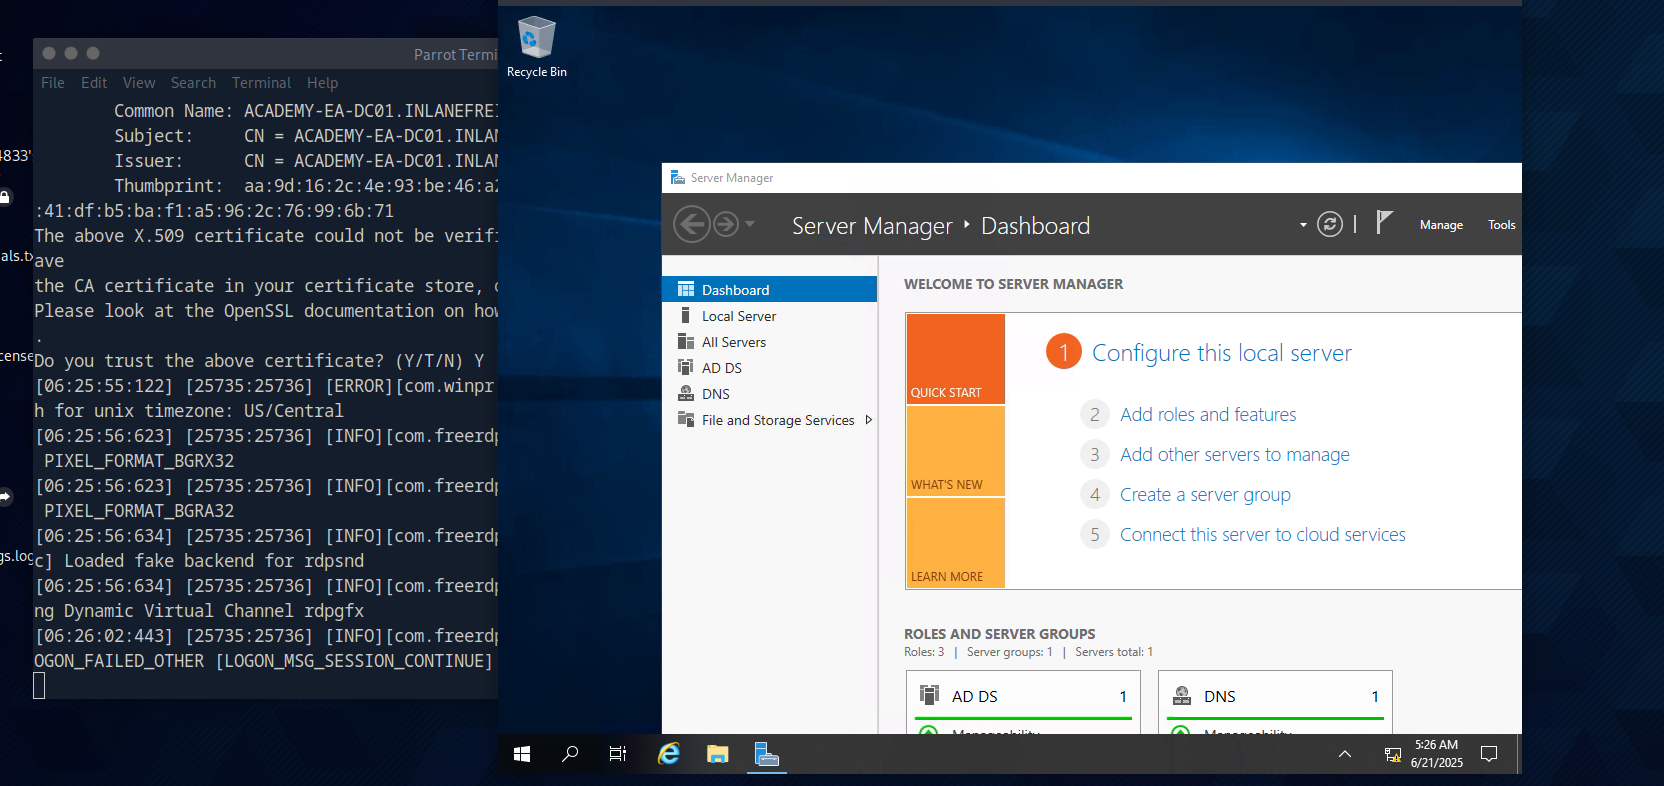
Amazing, let’s get to work!
Task 1: Manage Users
First, we are to add some new faces to the company to AD.
Adding new Users
Let’s showcase the Example of Andromeda Cepheus, to be created under the "inlancefreight.local" scope in "Corp > Employees > HQ-NYC > IT".
We shall include
- the full name
- the email address in the format
first-initial.lastname@inlanefreight.local - a display name
- the Attribute that the User has to change password at the next logon
Let’s go!
I selected PowerShell with “Run as administrator” - important for our AD actions that we have an elevated shell session!
1. Setting an initial password
Before creating the user, we need to define a secure password. PowerShell’s Read-Host -AsSecureString is perfect here:
PS C:\Windows\system32> $password = Read-Host -AsSecureString "Enter temporary password"
Enter temporary password: ***********
Why first? Because New-ADUser requires an -AccountPassword parameter, expecting it to be a (rather) secure string, not plain text.
I didn’t use a safe one, whoops - should’ve let one be generated.
2. Defining the Organizational Unit
Remember that Active Directory is structured like a tree, with Organizational Units (OUs) acting like folders for grouping users, groups, computers, etc.? You don’t just throw users into the root of AD, it’s best practice to organize them.
$ouPath = "OU=IT,OU=HQ-NYC,OU=Employees,OU=Corp,DC=inlanefreight,DC=local"
this reflects our given infos:
Corp
└── Employees
    └── HQ-NYC
        └── IT
Notice how here, we show IT at the very bottom, yet in the command, we start right there!
3. Creating the User
New-ADUser -Name "Andromeda Cepheus" -GivenName "Andromeda" -Surname "Cepheus" -SamAccountName "acepheus" -UserPrincipalName "a.cepheus@inlanefreight.local" -EmailAddress "a.cepheus@inlanefreight.local" -DisplayName "Andromeda Cepheus" -Path $ouPath -AccountPassword $password -Enabled $true -ChangePasswordAtLogon $true
feels.. unusual right? Wait, the command is too long, let me show you again in a structured manner:
New-ADUser -Name "Andromeda Cepheus" `
           -GivenName "Andromeda" `
           -Surname "Cepheus" `
           -SamAccountName "acepheus" `
           -UserPrincipalName "a.cepheus@inlanefreight.local" `
           -EmailAddress "a.cepheus@inlanefreight.local" `
           -DisplayName "Andromeda Cepheus" `
           -Path $ouPath `
           -AccountPassword $password `
           -Enabled $true `
           -ChangePasswordAtLogon $true
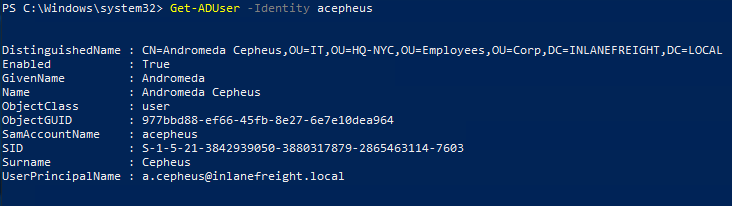 Using
Using Get-ADUser -Identity acepheus (searching for the sAMAccountName), we verified it worked!
Should we also confirm she’s in the right OU?
Get-ADUser -Identity acepheus -Properties DistinguishedName | Select-Object DistinguishedName

DistinguishedName
-----------------
CN=Andromeda Cepheus,OU=IT,OU=HQ-NYC,OU=Employees,OU=Corp,DC=INLANEFREIGHT,DC=LOCAL
What the hell is DistinguishedName again?
The Distinguished Name (DN) is the unique path to an object in Active Directory. It describes the object’s exact location in the directory tree, kind of like a full file path:
CN=Andromeda Cepheus,OU=IT,OU=HQ-NYC,OU=Employees,OU=Corp,DC=inlanefreight,DC=local
CN=Andromeda Cepheus→ This is the Common Name (which comes from the-Nameparameter inNew-ADUser)- The
OU=...sections come from the-Pathyou specified - The
DC=...parts are your domain:inlanefreight.local
So where did it come from?
Even though we didn’t explicitly set a DistinguishedName, we indirectly defined it via:
-Name "Andromeda Cepheus"→ becomes theCN-Path "OU=IT,OU=HQ-NYC,OU=Employees,OU=Corp,DC=inlanefreight,DC=local"→ defines where in the tree she goes
The system then automatically combines these into the final DN.
So essentially:
DistinguishedName = "CN=" + Name + "," + Path
You can’t directly set the DistinguishedName when creating a user—it’s always derived from -Name and -Path. But you can move objects later using Move-ADObject and specifying a new DN.
Automating User Creation
Do we want to do that three times? Maybe. 10 times? No please no. Let’s see what we can do regarding automation!
There is no editor installed, so we’ll stick to notepad.. ugh

I’ll give you the full code here again:
# Prompt for password
$password = Read-Host -AsSecureString "Enter temporary password for new users"

# Base OU path
$ouPath = "OU=IT,OU=HQ-NYC,OU=Employees,OU=Corp,DC=inlanefreight,DC=local"

# User definitions
$users = @(
    @{FirstName="Orion"; LastName="Starchaser"},
    @{FirstName="Artemis"; LastName="Callisto"}
)

# Create each user
foreach ($user in $users) {
    $firstInitial = $user.FirstName.Substring(0,1).ToLower()
    $lastName = $user.LastName.ToLower()
    $samAccountName = "$firstInitial$lastName"
    $email = "$firstInitial.$lastName@inlanefreight.local"
    $displayName = "$($user.FirstName) $($user.LastName)"

    New-ADUser -Name $displayName `
               -GivenName $user.FirstName `
               -Surname $user.LastName `
               -SamAccountName $samAccountName `
               -UserPrincipalName $email `
               -EmailAddress $email `
               -DisplayName $displayName `
               -Path $ouPath `
               -AccountPassword $password `
               -Enabled $true `
               -ChangePasswordAtLogon $true
}
Save the file with a .ps1 ending, i named mine Create-ADUsers.ps1.
cd C:\Users\htb-student_adm\Desktop

.\Create-ADUsers.ps1
Note that i left Andromeda out of the script, as we already created her. The script will throw an error if you leave her in but still create the other two!
Removing Users
We are now to remove Mike O'Hare and Paul Valencia.
From their names, we can figure their SamAccountNames are mohare and pvalencia
Remove-ADUser -Identity mohare -Confirm

and then
Remove-ADUser -Identity pvalencia -Confirm
How would it have looked if we entered a nonexisting
SamAccountName?

So that’s done. Task 1 has one more thing to do for us.
An Adam Masters submitted a trouble ticket - locked out of account because he typed his password too often.. i don’t think anybody in IT has ever heard of such problems… - HelpDesk already verified his Identity and confirmed his Cyber Awareness is uptodate.. didn’t work here huh.
We should unlock his account and force a password change at his next login
Saving Private Adam Masters
Let’s free the poor man, shall we?
Unlocking a User
Unlock-ADAccount -Identity "amasters"
amastersshould be hisSamAccountNamebased on company convention. Let’s pretend we were unclear and look him up.
Looking up a User
PS C:\Users\htb-student_adm\Desktop> Get-ADUser -Filter {Name -eq "Adam Masters"}

DistinguishedName : CN=Adam Masters,OU=Interns,OU=HQ-NYC,OU=Employees,OU=Corp,DC=INLANEFREIGHT,DC=LOCAL
Enabled           : True
GivenName         : Adam
Name              : Adam Masters
ObjectClass       : user
ObjectGUID        : 56d0f2af-e8a0-4d12-a910-c55257c702a2
SamAccountName    : amasters
SID               : S-1-5-21-3842939050-3880317879-2865463114-6108
Surname           : Masters
UserPrincipalName : amasters@INLANEFREIGHT.LOCAL
Nice, we were right hehe.
Resetting an Unlocked Account’s Password
Set-ADAccountPassword -Identity "amasters" -Reset -NewPassword (Read-Host -AsSecureString "Enter new password")
This way we now set a secure password that he can then change at his next Logon.
Forcing the Password Change
Set-ADUser -Identity "amasters" -ChangePasswordAtLogon $true
We already saw this property earlier at User creation , straight-forward really.
Task 2: Groups and Other Organizational Units
Now, we are to create the Security Group Security Analysts, add our new hires and nest the group in an OU of the same name, again in the IT hive.
1. Creating the OU
New-ADOrganizationalUnit -Name "Security Analysts" -Path "OU=IT,OU=HQ-NYC,OU=Employees,OU=Corp,DC=inlanefreight,DC=local"
Again, the
Pathworks it’s way UP in the command, remember.
2. Creating the Security Group
A very interesting one, concerning scope and category.
New-ADGroup -Name "Security Analysts" `
            -GroupScope Global `
            -GroupCategory Security `
            -Path "OU=Security Analysts,OU=IT,OU=HQ-NYC,OU=Employees,OU=Corp,DC=inlanefreight,DC=local"
GroupScope Global: Standard for groups used across the domain.GroupCategory Security: This makes it usable for permissions (not just email lists, nice little add-on).
3. Adding our Users
Add-ADGroupMember -Identity "Security Analysts" -Members acepheus
Add-ADGroupMember -Identity "Security Analysts" -Members ostarchaser
Add-ADGroupMember -Identity "Security Analysts" -Members acallisto
4. Verification
To verify here, you can again hit
Get-ADGroupMember -Identity "Security Analysts" | Select-Object Name, SamAccountName

Name              SamAccountName
----              --------------
Andromeda Cepheus acepheus
Orion Starchaser  ostarchaser
Artemis Callisto  acallisto
So this all worked out, interesting feeling to create our first Security Group right :D
Task 3: Managing Group Policy Objects
Here now, we’re asked to create a custom Group Policy Object (GPO) for our newly created Security Analysts group.
For this, we shall first duplicate the group policy Logon Banner, rename and modify it.
1. Copying the GPO
Copy-GPO -SourceName "Logon Banner" -TargetName "Security Analysts Control"


DisplayName      : Security Analysts Control
DomainName       : INLANEFREIGHT.LOCAL
Owner            : INLANEFREIGHT\Domain Admins
Id               : 758c6f49-859d-4495-907b-53068d161dc3
GpoStatus        : AllSettingsEnabled
Description      :
CreationTime     : 6/23/2025 6:30:03 AM
ModificationTime : 6/23/2025 6:30:03 AM
UserVersion      : AD Version: 1, SysVol Version: 1
ComputerVersion  : AD Version: 1, SysVol Version: 1
WmiFilter        :
This command is rather straight-forward, directly assigning the TargetName is convenient for us so we can directly go on to linking it to our Security Analysts OU.
2. Linking the GPO to the “Security Analysts” OU
 The used command:
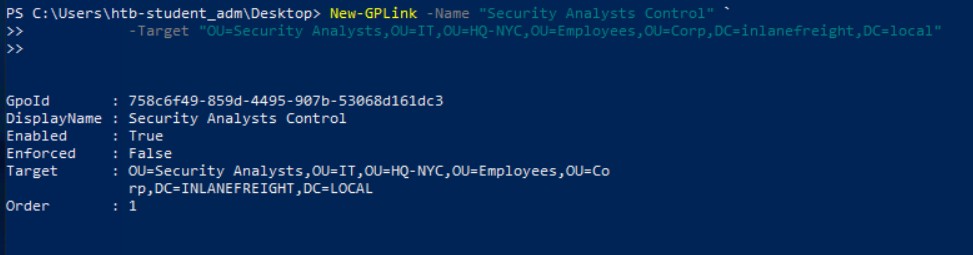
New-GPLink -Name "Security Analysts Control" `
           -Target "OU=Security Analysts,OU=IT,OU=HQ-NYC,OU=Employees,OU=Corp,DC=inlanefreight,DC=local"
This ensures the policy only applies to the Security Analysts group.
3. Modifying Policy Settings
Here, we’ll do it a little different from the HTB Academy course yet again, trying to only use our terminal.
The target is to give our analyst the tools they need (PowerShell and CMD) while enforcing security controls where necessary.
3.1 Allowing PowerShell and CMD
Set-GPRegistryValue -Name "Security Analysts Control" `
  -Key "HKCU\Software\Microsoft\Windows\CurrentVersion\Policies\Explorer" `
  -ValueName "DisallowRun" -Type DWord -Value 0
This command modifies the user-level registry configuration in the GPO:
HKCU(HKEY_CURRENT_USER) means this policy targets user sessions, not the machine.DisallowRunis a Windows Explorer policy that, when enabled (1), blocks specified executables from launching.- Setting it to
0disables that blocking behavior.
Though this seems not ideal as it potentially goes beyond PowerShell and CMD.. I’ll have to research a better version later.
3.2 Blocking Removable Media
Set-GPRegistryValue -Name "Security Analysts Control" `
  -Key "HKLM\SOFTWARE\Policies\Microsoft\Windows\RemovableStorageDevices" `
  -ValueName "Deny_All" -Type DWord -Value 1
This modifies the machine-level registry configuration in the GPO:
HKLM(HKEY_LOCAL_MACHINE) applies this policy to the computer itself, regardless of user.- The
Deny_Allvalue under this key instructs Windows to block access to all removable storage devices. - A value of
1enforces the block.
By using Set-GPRegistryValue, we’re directly modifying how Group Policy writes settings into the registry on target machines. These changes are applied during the next policy refresh (gpupdate) and are scoped only to users or systems in the Security Analysts OU.
Task 4 (different target)
In this part of the lab, I was given access to two separate Windows systems:
- One was a domain controller (DC), responsible for managing Active Directory.
- The other was a standalone Windows 10 client, not yet joined to the domain.
This setup reflects a common real-world scenario: you often manage machines remotely and need to join new systems to the domain from outside. The client is where the domain join happens, while the domain controller hosts the Active Directory environment you’ll be integrating with.
New RDP Session
xfreerdp /u:image /p:Academy_student_AD! /v:10.129.42.198 +clipboard /cert:ignore
Adding a Computer to the Domain and Placing it in the Correct OU
In this final step of the lab, I was tasked with integrating a freshly provisioned Windows workstation into the INLANEFREIGHT Active Directory domain. This process is fundamental in enterprise environments, as domain membership ensures systems receive security policies, access control, and centralized management.
Objective
- Join the Windows 10 client (
ACADEMY-IAD-W10) to theinlanefreight.localdomain. - Use domain credentials (
htb-student_adm) to authorize the join. - Ensure the system is placed into the correct OU, so that Group Policy Objects (GPOs)—especially those tailored for the Security Analysts—apply automatically.
Step-by-Step Overview
1. Connect to the Workstation
I accessed the non-domain-joined Windows 10 host using RDP:
xfreerdp /u:image /p:Academy_student_AD! /v:<target_ip> +clipboard /cert:ignore
2. Open System Settings
On the client machine:
- I opened the System control panel (shortcut:
sysdm.cpl) - Clicked on “Change settings” next to the computer name
- Selected “Domain”, and entered:
inlanefreight.local
3. Authenticate the Join
I used the domain administrator account:
- Username:
htb-student_adm - Password:
Academy_student_DA!
The system prompted for a restart upon successful domain join.
4. Verify Domain Join
After rebooting, I verified the machine was now a domain member:
- I logged in with a domain account
- Confirmed domain name in System Properties
Moving the Computer into the Correct OU
By default, newly joined computers go into the generic Computers container. However, for group policies to apply properly, the host needs to be moved to the specific OU we created for analysts:
# Move the computer object into the Security Analysts OU
Move-ADObject -Identity "CN=ACADEMY-IAD-W10,CN=Computers,DC=inlanefreight,DC=local" `
  -TargetPath "OU=Security Analysts,OU=IT,OU=HQ-NYC,OU=Employees,OU=Corp,DC=inlanefreight,DC=local"
This ensures that the “Security Analysts Control” GPO is applied to the computer, enforcing password policy, USB restrictions, and other role-specific configurations.
Joining a computer to a domain is more than a checkbox—it brings the machine under centralized control. But just being in the domain isn’t enough; proper OU placement is what links the device to its intended policies. Without that, group policies wouldn’t apply as expected.
This final task ties everything together: identity, policy, security, and organizational structure.
Puh, this series was a lot. Next, Academy introduced some interesting next skill paths and boxes to pwn.. IppSec has some pretty interesting stuff on them hehe. Anyways, see you on the next one!